This is a series, check out the previous posts at part 1, part 2, or part 3. This time, I’m going to make this probe hopefully do something.
I started out just verifying that the Pocket NC would treat the vers.by probe the same as the built in tool setter probe. So I ran a tool measure cycle, and then just tweaked the probe by hand. Woohoo! It stopped the cycle just like normal. Actually measuring a tool worked too if the probe wasn’t activated, or if it wasn’t plugged in. Success.
Probing Scripts
Next, I got a crash course in G-Code. Mostly I used the Linux CNC reference, since that is what the Pocket NC used and all I needed to be interoperable with. Having done no real manual G-Code programming before aside from my limited python auto-generation, I was I guess surprised that there was any real support for in-program scripting. The fun limitations:
Variables can either be “numbered” or “named”. 30 of the “numbered” variables are function local, (and are also necessary for argument passing), and all the remainder are global variables. “named” variables can be global or function local.
All control flow requires human assigned unique integers for each instance of that control flow construct. i.e., an “if-else-endif” chain requires a human assigned integer that is unique script wide to be applied to the if, and its matching elses and end-if statements.
Largely, subroutines need to be in a file by themselves, and all in the same directory.
Annoyingly, expression grouping is with square braces “[]”, not parentheses, “()”.
“comments” are overloaded to also be used for all “non-machine” operations. If you want a comment to actually be a comment, the best and seemingly standard way is to ensure all comments are prefixed with a space.
Some things can be indirected natively, but not for instance, “which axis to move”. That must be specified using a literal character in each command.
The first probing function I needed was to reference the outer diameter of a cylindrical feature. I started by writing a subroutine which would perform a single linear probe in a parameterizable axis. It first probes quickly, then backs off a bit to probe again slowly. To work around the lack of axis indirection, it just uses if-else chains to handle the X, Y, and Z axes.
Next, I used that in an cylindrical feature probing script, where you manually position the probe along one of the major axes at the proper Z probing depth, assuming that the feature is “roughly” at the center of the current coordinate system. It would then probe all 4 axes, finally setting the coordinate system 0, 0 to be the center of the feature. For this, I “simulated” some arrays using the 30 numbered function local variables so that the probing logic could be implemented in a loop.
This did the trick, and now I could reference cylindrical (and square) features using G54.
Repeatability
I ran this around 30 times over the course of a few hours, including remounting the probe a few times and changing the temperature and airflow to get an idea of the repeatability of the probing process.
Axis
Standard Deviation
Peak to Peak
X
0.00031″ (0.0079mm)
0.0012″ (0.030mm)
Y
0.00044″ (0.0112mm)
0.0015″ (0.038mm)
Probing Repeatability
So, roughly around 1 thousandth or 0.02mm of absolute repeatability. I might be able to improve that by tweaking the probing speed or otherwise adjusting parameters, but the Pocket NC itself isn’t a whole lot better so it should be “good enough” for now.
This project is at a functional point for myself, but isn’t quite ready for others to use. The biggest issue is the necessary modifications to the shaft of the vers.by probe, as they aren’t easy to do and require additional equipment. The other pieces also still have some rough edges that should be filed off, including keeping chips out of the RJ45 connectors and getting a PCB in that doesn’t require bodge wires to work.
I also intend to do a little work to demonstrate that the probing can be used to register features across operations properly.
My eventual goal is to eventually get the design to a state where it is nearly “off the shelf” and list it on tindie. To do that will depend upon if I can figure out a better solution for the probe shaft.
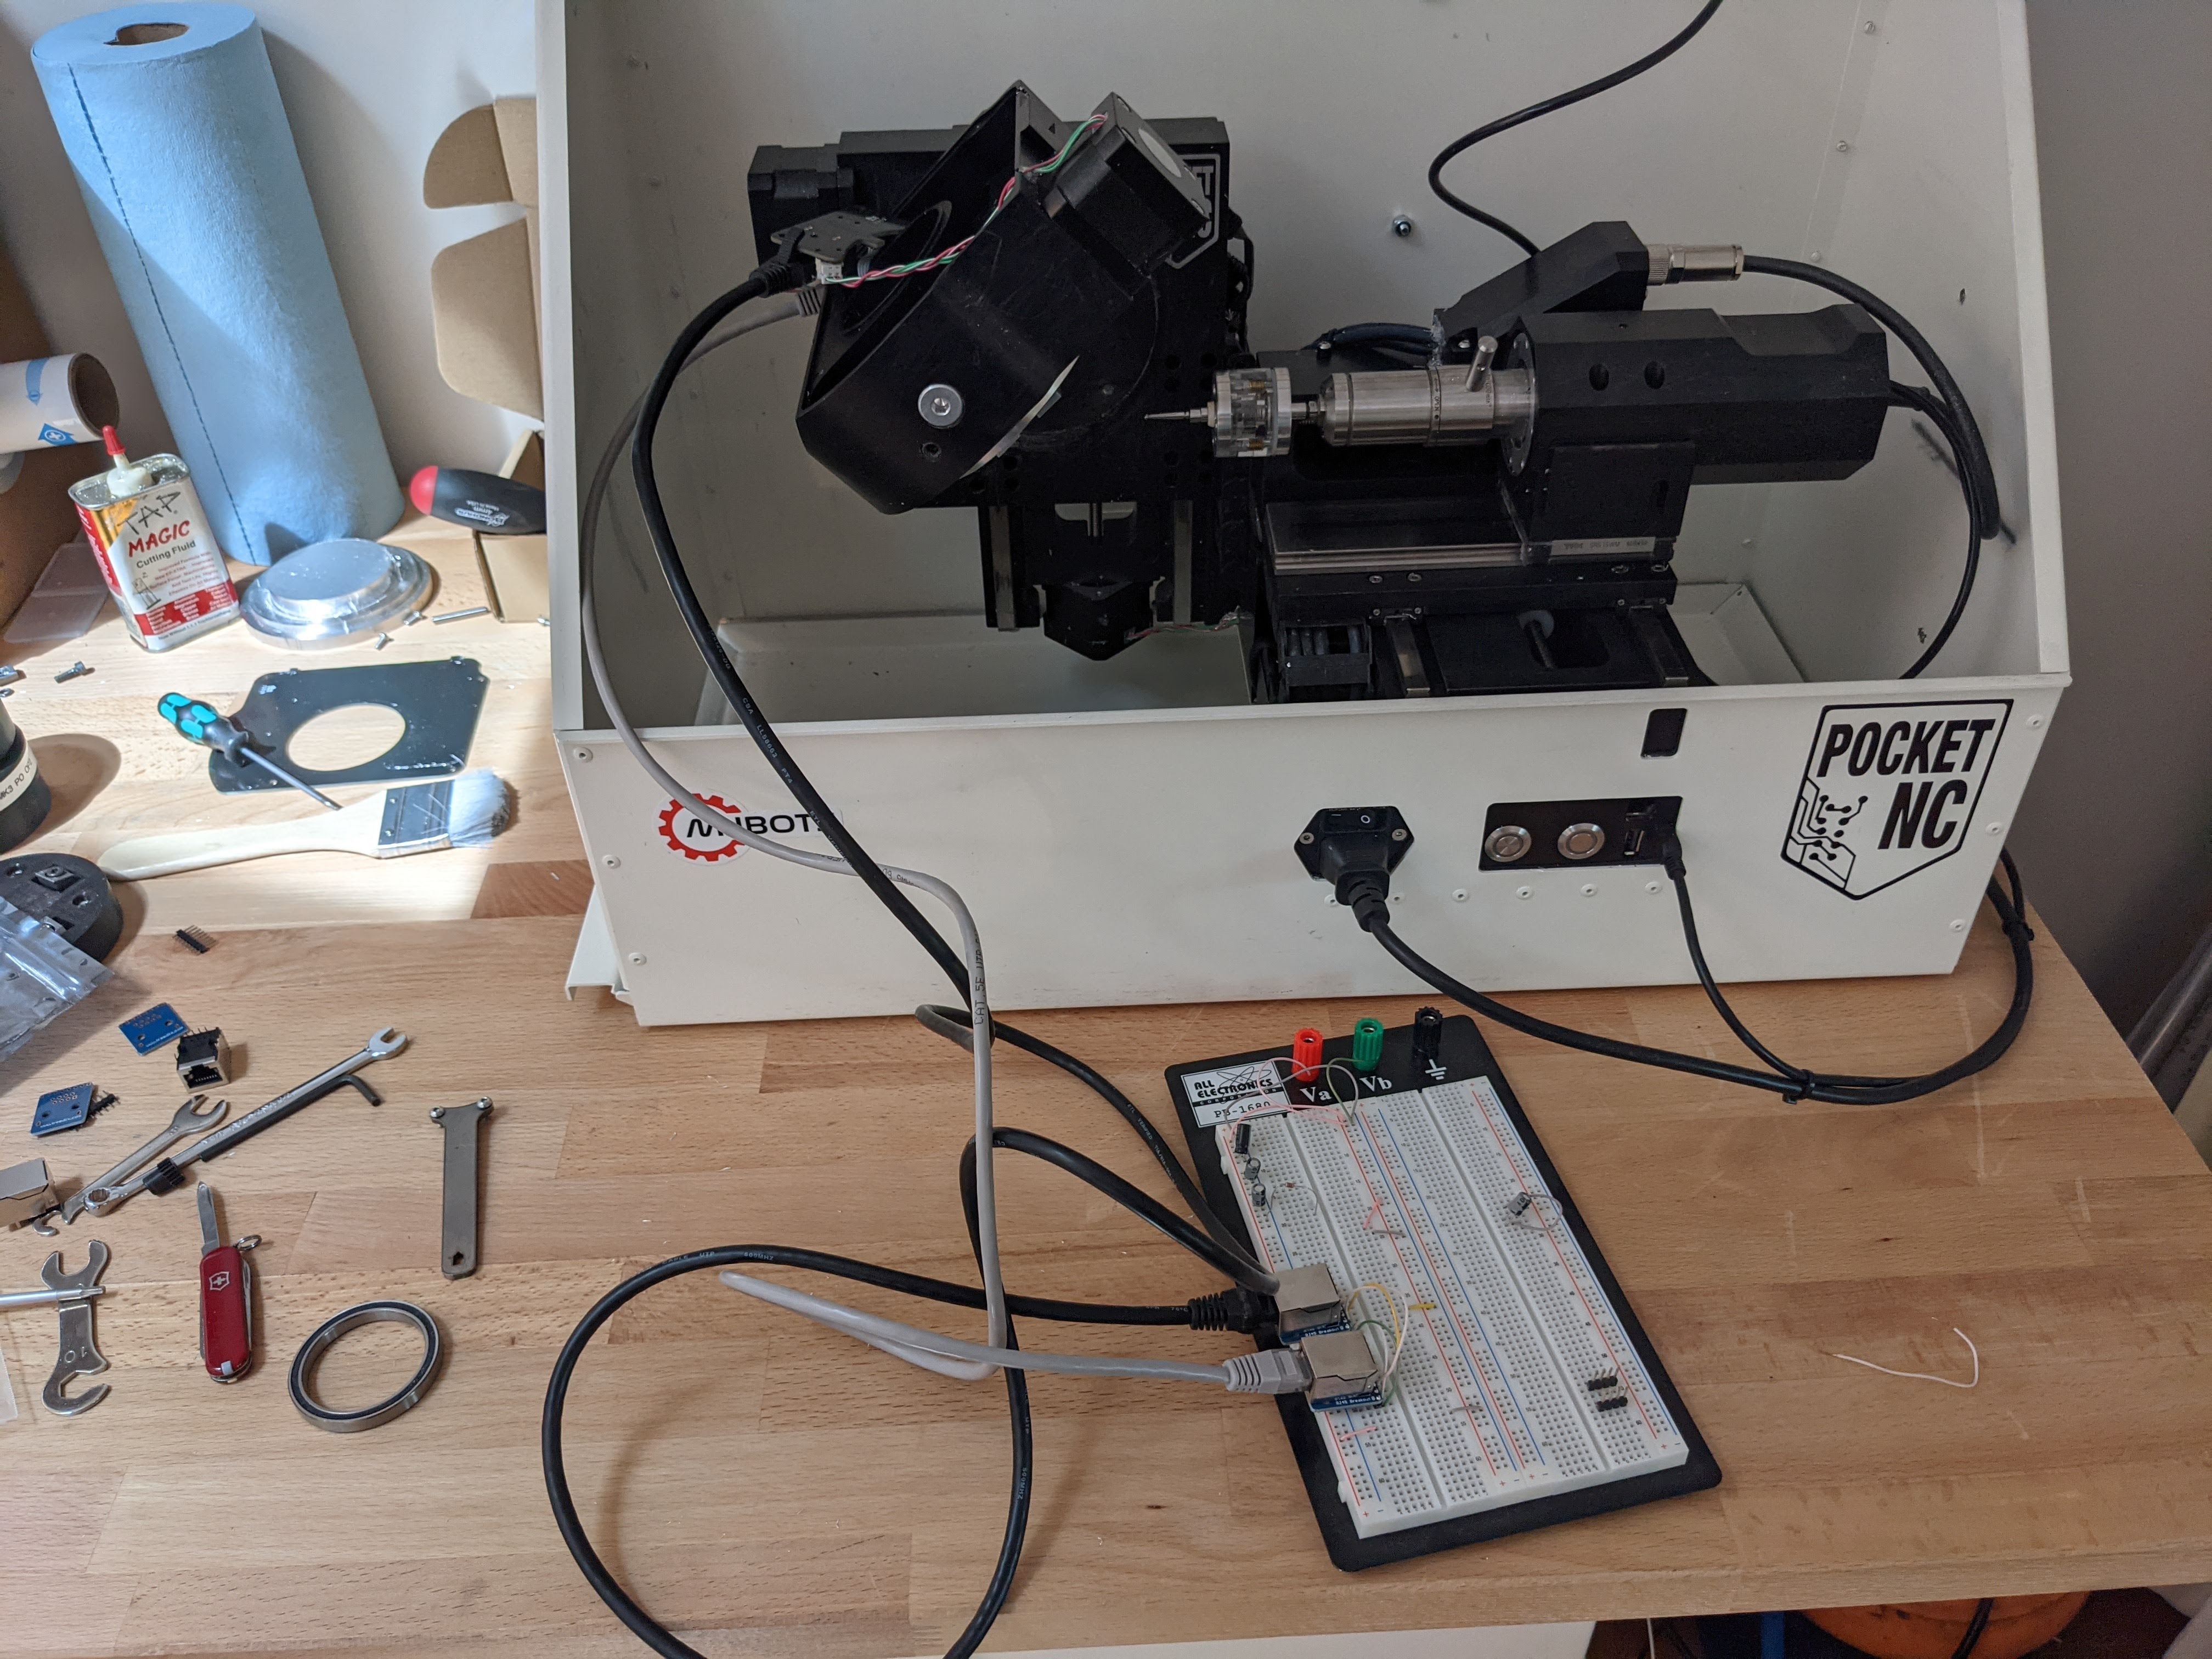
In part 1 and part 2, I covered my motivation and the mechanical hardware behind a touch probe add-on for my Pocket NC V2-50. In this post, I’ll cover my prototype electrical hardware.
My intention with the probe was to connect it logically “in parallel” with the existing tool setter probe that the Pocket NC has. I figured that would be likely easiest to integrate with the Linux CNC scripts when I got to the software point. The existing tool setter probe is located in the rotating B axis. That is connected to the Y axis via a single CAT5-ish cable, so my hope was that I could devise something which would pass through the necessary signals on that cable while also paralleling in the new touch probe.
To start, I acquired some RJ45 to .1″ header breakouts from Amazon and broke open the bottom of the Pocket NC B axis table, and wired up a pass through on a breadboard:
Using a multimeter to probe around, it was pretty obvious the first 4 pins went directly to the B axis stepper motor. Of the remaining, 5 was pretty obviously ground. Slightly confusingly, the one that had 3.3V on it appeared to be a pullup for the open-drain normally open tool setter, while the pin with 2.8V on it was the power for tool setter and the B axis hall effect homing sensor. The one remaining pin was the output of the B axis homing sensor.
There were a few electrical challenges here. The first was that the vers.by probe needs 5V, not 2.8V. To begin with, I just wired in 4 AA batteries, and for a longer term solution I picked up a 5V charge doubler from digikey, the TPS60241.
The second required a fair amount of thought: how to make the normally closed vers.by probe act “in parallel” to the built in tool setter, while still being able to disconnect the probe and maintain tool setter functionality. Just inverting the normally closed signal would result in something that made the tool setter appear to be always activated whenever the touch probe was disconnected.
Here, I relied on a design artifact of the vers.by probe. The “USB cable” connector had both D- and D+ connected together, but in the probe itself. So if the probe or cable were disconnected, those two nets would have no connection. Thus I pulled one high, and pulled one low. Then the three states I cared about looked like:
D-
D+
Probe Disconnected
0
1
Probe Connected and Inactivated
0
0
Probe Connected and Activated
1
1
I used a 74HC series NAND gate to only activate a parallel N-FET in that final case, where the probe is connected and activated.
I breadboarded this with the 4 AA batteries, then did a proto-board implementation that used the 5V charge pump too. I was going to use the same SMT components on the proto-board implementation, but the NAND gates, despite being labeled as the same 8VSSOP package as the charge pump, and both from TI, turned out to be a package that was too small for me to “dead bug” solder. So, instead I just flipped over the DIP package NAND I had and wired that up.
The charge pump wired up under the microscopeThe final “proto-board”
Then using some cardboard, hot glue, and a zip tie, I fastened it to the back of the A axis stepper motor on the Pocket NC:
Before I was able to really test this well, a PCB from OSHPark came in, so I used that with a 3D printed enclosure:
Last time in part 1, I talked about why I wanted to add a touch probe to my Pocket NC. This time, I’ll cover the basic hardware necessary to make it happen.
I decided to start with an inexpensive probe so that as I was figuring things out, I wouldn’t be too sad if I smashed it a few times. I’ve seen a number of other hobby machinists use the “vers.by” probes, so I decided to give them a try too.
This probe requires 5V-24V power, has a 6mm shank, and provides a NPN-NC output with a USB connector as the physical connector. Note, it isn’t USB, but just uses that connector for power and the signal.
Mounting
To start with, I needed to get the probe such that I could mount it in the spindle of the Pocket NC. The V2-50 I have can handle a 4mm shank at most, and that is what I primarily use. Obviously, 6mm is bigger than 4mm, so something needed to be done.
So, I wouldn’t be a quality engineer if I didn’t have the brand new toy disassembled within hours of receiving it:
What I ended up doing was turning down the 6mm shaft to 4mm on one of the Artisan Asylum’s manual lathes.
This was pretty challenging. First because the shaft was already permanently mounted into that relatively thin base section, so getting the part trued up in the chuck took some time. Second, because it sticks out so far, I could only take excruciatingly light cuts. In hindsight, I should have worked harder to get the opposite side supported. The entire operation took something like 3 hours. However, when done, I had a probe with a 4mm shaft!
And hey, it fits!
After a bit of tuning with my 2 micron dial indicator, and the provided adjustment screws, it seems to pretty dialed in.