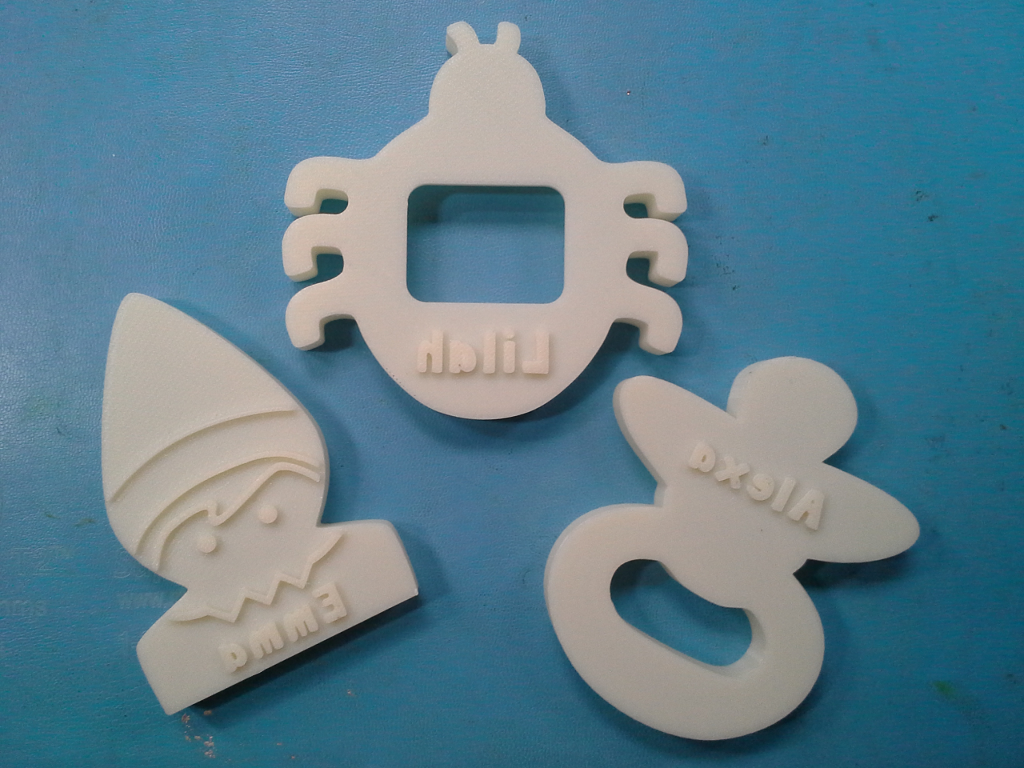
3D Printed Cookie Cutters
For my nieces this holiday season, in addition to actual cookies, I printed up some customized cookie cutters on the Artisan’s Asylum 3D printer (A Stratasys uPrint SE Plus)
Inkscape
 The toolchain I used could be applied to a number of 3D projects. First, I either found an image kind of resembling what I had in mind using google images, or drew up a sketch on a piece of paper. Then, I transcribed that image into an inkscape vector drawing, similar to the elf one on the right. The inkscape drawing contained a closed shape for the outer dimensions of the part, the inner dimensions of the part, as well as closed shapes for any surface features that I wanted. I used the “Linked Offsets” feature to force the inner wall boundary to be a precise distance away from the outer wall boundary. Colors were chosen arbitrarily, as the next step ignores the fill colors entirely.
Freecad
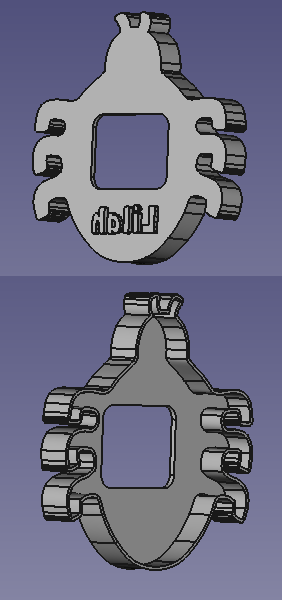 Next, I fired up freecad, which can import SVG elements as geometry primitives in the 3D view. Unfortunately, and what was to become the biggest annoyance with this project, is that its import of SVG paths isn’t particularly robust. Notably, for some elements it doesn’t close them properly, and for others it doesn’t even turn them into curves, rather importing them as sets of points. This was done in a hurry, and while I didn’t have enough time to actually fix the problems in freecad, I did dig around in the source enough to figure out that they were not handling paths which ended up on the exact same position as the first point correctly. One problem was that freecad would only count a path as closed if the “z” element was used to close it off. Another was that paths with kinks would just not close with no indication why, even if the kinks were too small to be visible. So, my workaround was to manually edit the .svg files in emacs after inkscape saved them and fiddle around with them afterwords to try and get freecad to import them as closed surfaces. Then for the paths that still didn’t work, I looked extra close in inkscape for any kinked paths. In this project, those largely resulted from inkscape’s linked offset paths being glitchy around regions of high curvature.
With those surfaces imported, I then proceeeded to do a series of extrusions, differences, and unions to get the parts that I was looking for. In some cases, when I ran into limitations of freecad’s boolean operation engine, I had to go back to inkscape to tweak the artwork. This was largely around different objects which were intended to share a border, which didn’t work out so well.
netfabb
After getting the solid models into good shape in freecad, I exported an .STL file for each model. I pulled this .STL file into netfabb studio basic to verify the volume and to do mesh repair. Sometimes freecad will export .STL files that netfabb doesn’t complain about, but I figure it doesn’t hurt to let it fix up any problems it finds.
uPrint 3D Printer
The final step is printing. This is largely uneventful: feed in the STL files, configure the print job, hit print, and come back in a couple of hours. Usually, when printing a part, you can count on the first iteration to have some problems and this case was no exception. I had designed the cookie cutter wall thickness to be 1.25mm wide, figuring that would be 5 passes of the uPrint. However, the uPrint ended up not actually filling the inside of the wall in many places, resulting in two very thin walls separated by a small void. Given more time, but in this case I was out, so I moved onward with what I had!
Baking!
So, the final test, using them to cut cookies… Well… They mostly worked. The separated outer walls caused a lot of cookie material to get wedged up inside. I also realized at this point why most cookie cutters have an exposed central area. Without one, extracting the cookies is quite challenging. I painstakingly used chopsticks and a knife, which worked adequately, if with great effort. Certainly, if I were to make a second revision, I would fix both the separated wall problem, and make the cookies easier to eject afterwards.
Below is a picture of the final 3 parts before being gummed up with a season’s worth of cookie making.